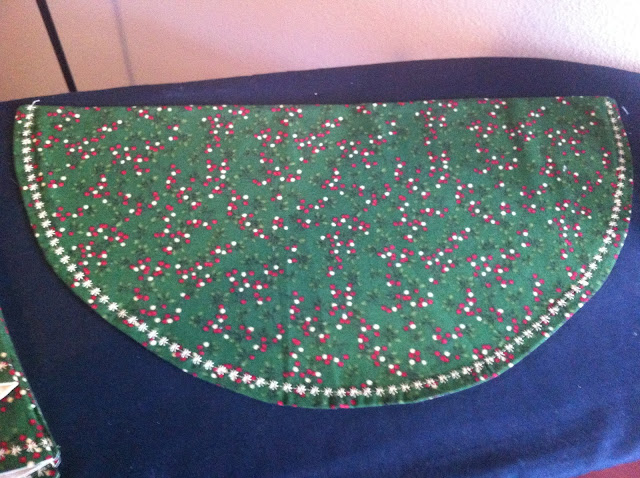
Makes 6 Napkins
Materials:
1.5 meter front fabric
1.5 meter coordinating backing fabric
Matching thread for handsewing the opening and stitching the napkin
Contrasting thread for the "garland" detail or ric-rac/ribbon etc which ever you choose.
Template- Christmas Napkin Template
Template:
To make the template click on the link above and print 4 copies. Tape together. As stated on the template ignore the dips in the corners where the templates meet. You will be making a semi circle with you template.
Cutting
Using your template and your first fabric either trace around your template (remember to NOT trace the dips, just make a smooth semi-circle) and then cut the semi circle or just cut around. Whichever way you prefer. You will be cutting 6 semi circles.
Do the same thing with your second fabric.
***** If you have a directional print make sure to cut your semi circles with the flat bottom to the top. If you have your directional prints cut with the "tops" of say a bird pointing to the circular part f the napkin they will be upside down when folded.********
 |
| See how the directional print has been cut both ways? |
 |
| Now when we take directional print with the straight edge at the bottom it will end up upside down |
Sewing:
Now that you have 6 of each fabric cut out take one of each and layer them right sides together. Start sewing with your matching thread about 3-4 inches before the straight part ends and continue all the way around the curve and stop about 2" from your starting point. This leaves you an opening for turning right side out on the straight edge which makes it easy to sew closed later. Repeat 5 more times!
Clip the 2 corners and if you can trim your seam allowance on the curved edge just a bit. I didn't but its up to you :)
Turn right side out and poke out the corners into a nice point with a chop stick or something similar that won't go through your fabric. Start ironing your napkin making sure to push the seam out so you have a nice crisp edge. It will take a bit of fiddling so take your time and don't burn yourself!
Hand sew your opening closed with matching thread using your favourite stitch. Whip stitch works fairly well just try to take small stitches so that it is hard to see your thread.
Once you have all those stitched closed, (I promise it won't take a super long time! Just throw on a good show or cd and stitch away)we can start on the fun part!!
Sorry! No pictures here but pretty self explanatory!
Garland!
Thread your bobbin and machine with your contrasting thread. I used a gold coloured thread which matches my napkins since most of mine had gold accents in the fabric.
I set my machine to an astrik (*) stitch because it reminded me of snowflakes. Use whatever stitch you like on yours. Now you will be stitching ONLY THE CURVE! Do NOT stitch on the straight edge!!! It will look a little funny if you do. Take your time and you may need to stop and reposition slightly depending on your machine.
Once you get to the other end it worked best for me to chain sew the garland, so one I was at the other end of the curve I butted the next napkin (straight edge to straight edge and just kept sewing the garland. This way I was sure there was no threads being tangled at the back by stopping and starting again. Plus it make it quicker! Then just cut apart as you go. I might add a smidge of fray check to lock the stitching in place and prevent it from coming undone.
If you don't have decorative stitches on your machine don't despair!! Just find some coordinating ribbon or ric rac and sew it onto both sides of the napkins curve. Another option is something like bias tape on the curve. Just use your imaginations and you will find something to use :)
 |
| You can kind of see the garland after the needle. and the pressed edge of the curve before it. |
 |
| Here you can see the chain stitching of the napkins |
Folding
You are almost done! The best way is to just play around a little until you find the number of folds you like best. I have pictures of napkins showing a 4 fold and 6 fold trees. I personally like the 6 fold better but whatever you prefer! I fold mine now by trial and error but I know there are those of you who like specific directions. I found starting in one end with a 45degree triangle works well for a 6 fold tree. Just kind of follow along with the pictures.
At this point straighten it up a bit and adjust as needed to make sure no sides are sticking out funny and iron it all down!
Here is some with 4 folds They are done with a 30 degree angle.
Now if you really want to you can sew lines in a matching thread along the ironed lines so that when they are washed the recipient will know where to fold again.
That's it! Hopefully you all enjoyed this tutorial. Feel free to ask questions in the comments!!!
ALSO don't forget you can enter the Digital Scrapbooking Giveaway from My Memories in my previous post!! Just go to my previous post and follow the directions at the bottom of it- all you need to do is pick your favourite layout and put it in the comments. It is really fun and enjoyable and super easy to use!
Have a great day and Happy Stitching!!!
Kallie


